

 |
|
|
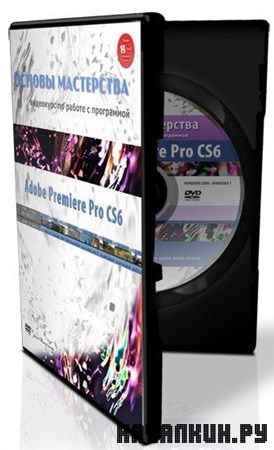 Adobe Premiere Pro быстро становятся номер один в системе редактирования для широкого круга специалистов и полупрофессиональных редакторов во всем мире. Вот и в CS6 версии, Adobe добавила ряд новых элементов, задача которых - экономить Ваше время при нелинейном монтаже. К ним относятся специальные эффекты новой линейки, которые раньше можно было увидеть только в Adobe After Effects а также новый улучшеный интерфейс. В этом курсе эксперт - редактор и ведущий Maxim Jago представит полное руководство по работе с Adobe Premiere Pro CS6, охватывающее все: от основ нелинейного монтажа до самых современных новых возможностей. Вы научитесь использовать несколько типов медиа - файлов в Premiere Pro, объединить их для производства профессиональные изменений, применить эффекты, добавить названия, работать с аудио и в различных форматах, включая DVD, Blu-ray и файлы. Introducing Premiere Pro CS6 • Video Editing Workflows • An Overview of the Interface • Why Premiere Pro Is the Post-Production Hub • Workspaces • Important General Preferences • Personal Preferences Premiere Pro Projects • General Project Settings • Scratch Disk Settings • Using Sequence Presets • Sequence Settings • Video Preview Settings • Sequence Track Settings Importing Media • Importing Media Files and Images • Importing Media from File-Based Cameras • Capturing a Whole Tape or Selected Shots • Batch Capturing • Importing Projects from Final Cut Pro and Avid • Clips and Media Files Organizing Media • Introducing the Project Panel • Finding Assets in the Project Panel • Attaching a Script or Transcript • Speech Analysis • Interpreting Footage • Configuring Clip Audio Channels Editing Essentials • The Monitor Controls • Selecting Part of a Clip • Adjusting Playback Resolution • Using Subclips • Introducing the Timeline Panel • Adding Clips to a Sequence • Three-Point and Four-Point Edits • Storyboard Editing • Targeting Tracks Taking Control of the Timeline • Track Controls • Selecting, Linking, and Unlinking Clips • Rearranging Clips in a Sequence • Using the Clipboard • Lifting and Extracting • Deleting and Ripple Deleting • Working with Markers Adding Transitions • Applying a Transition Between Two Clips • Understanding Rendering and the Work Area • Changing Transition Settings • Creating an Audio Crossfade Advanced Editing Controls • Changing the Playback Speed of Clips • Adjusting Playback Speed over Time • Replacing Clips on the Timeline • Replacing Footage for Clips in the Bin • Nesting a Sequence • Creating Nested Sequences in the Bin and on the Timeline • Trimming in the Source Monitor • Trimming on the Timeline • Timeline Trimming Tools • Trimming Keyboard Shortcuts • Split Edits: Making J and L Cuts • JKL Trimming • The Timeline Tools • The Trim Monitor Putting Clips into Motion • Fixed Effects for Video and Audio Clips • Animating with Fixed Effects • Creating Effect Presets Multicamera Editing • Preparing for a Multicamera Edit • Performing a Multicamera Edit • Adjusting Multicamera Edits Editing and Mixing Audio • The Audio Workspace • Audio Track Types • Normalizing Audio in the Bin and on the Timeline • Keyframing Volume Changes in the Timeline • Overview of the Audio Mixer • Understanding Latch/Touch/Write Automation Modes • Using Parametric EQ • Applying Audio Effects to Tracks with the Audio Mixer • Timeline Trimming Tools • Adjusting Audio Level in the Effect Controls Panel Adding Video Special Effects • Introducing the Effects • Adding Effects, Changing Settings, and Removing Effects • Working with Adjustment Layers • Using Keyframes in the Effect Controls Panel • The Warp Stabilizer and Rolling Shutter Correction • Burning in Timecode • Basic 3D • Blurs Color Correction • Using the Color Correction Workspace • Vectorscopes and Waveforms • The Fast Color Corrector • The Three Way Color Corrector • Secondary Color Correction • Burning in Timecode • Curves Working with Multiple Layers • Using Blend Modes • Using the Ultra Key Effect • Using the Lumakey Effect • Introducing Garbage Mattes • Using the Track Matte Key Effect Creating Titles • Introducing the Title Tool • Working with Text • Creating Shapes and Managing Layers • Working with Title Templates Managing Your Projects • Getting Organized • Using the Project Manager Outputting to Tapes, Media Files, and Blu-ray • Preparing a Project for Tape Output • Recording to a DV or HDV Tape • Exporting Your Sequence to a File • Producing Multiple File Types with Adobe Media Encoder • Sharing with Apple Final Cut Pro and Avid Media Composer • Exporting Frames • Outputting to Disc Project Exploration • Create a New Project, Make a Sequence, and Import Media • Pick Some Shots and Add Them to Your Sequence • Add a Simple Title, Some Fades, and Music • Send the Sequence to Adobe Encore • Create a Simple, Menu-Driven Blu-ray with Adobe Encore Closing Thoughts • Closing Thoughts on This Course [thumb]
Уважаемый посетитель, Вы зашли на сайт как незарегистрированный пользователь. Мы рекомендуем Вам зарегистрироваться либо зайти на сайт под своим именем.
|
|